
Sourcing Guide
How to Measure Product for Custom Box Design: A Buyer’s Step-by-Step Guide
September 2026 | 16 min read | By ChromaPack Engineering Content
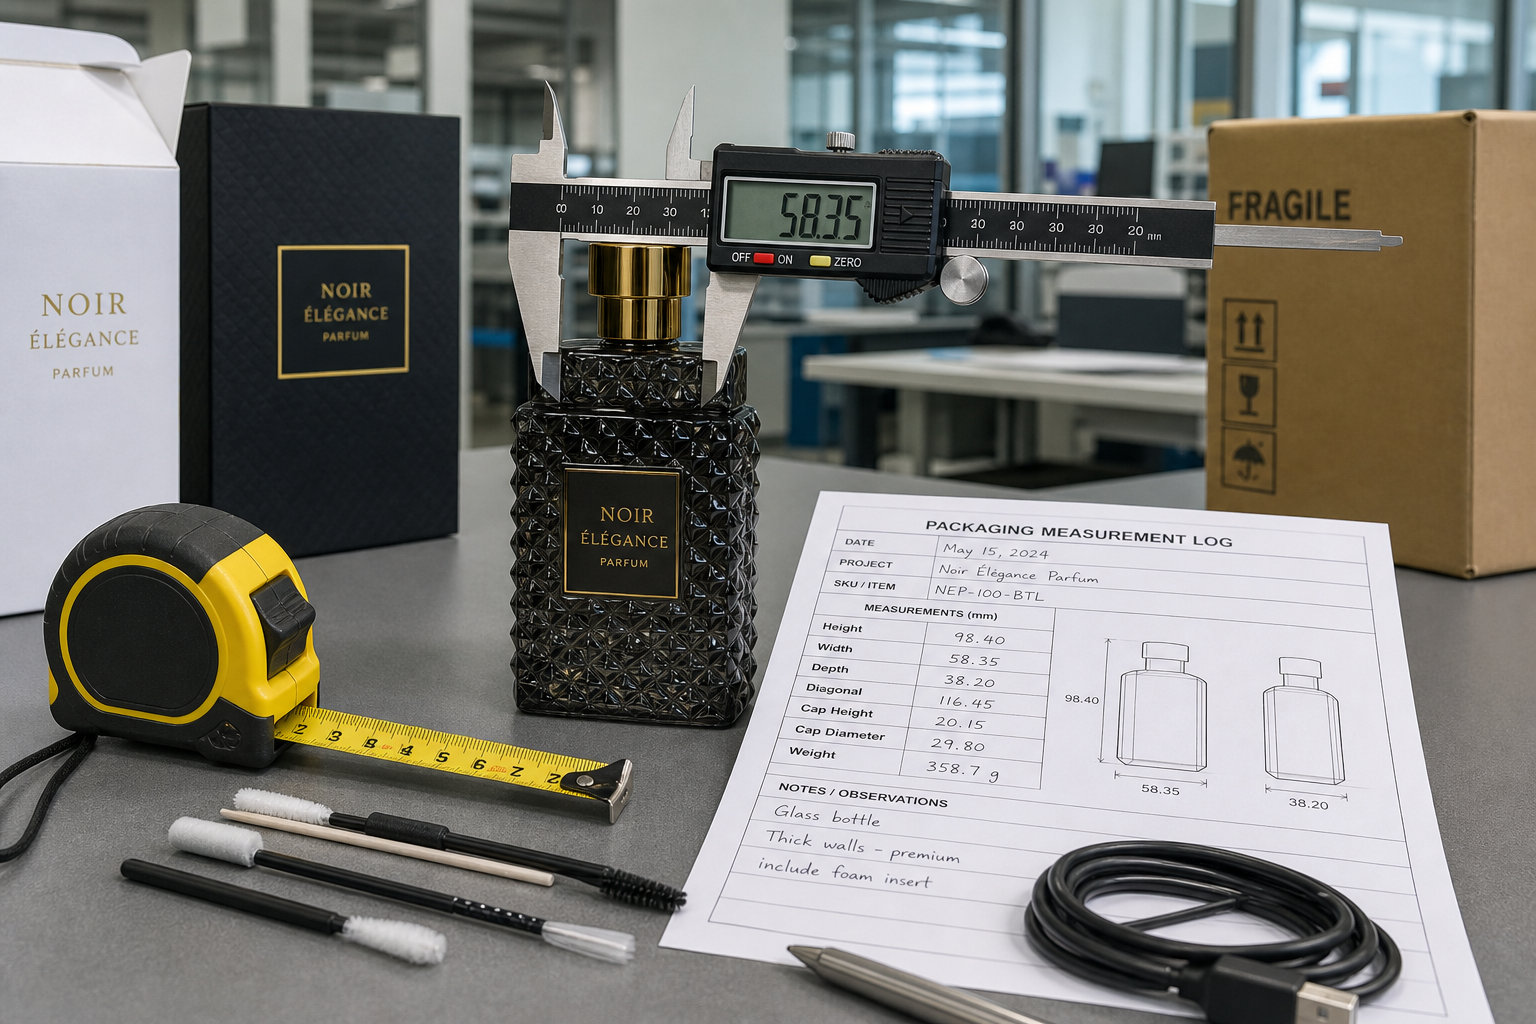
Short answer: To learn how to measure product for custom box design, first freeze the exact pack-out and orientation. Measure several production units at their extreme points, record the minimum and maximum length, width, height and weight, and include every accessory, bag, manual or moving part that ships inside.
Treat the result as the product envelope—not the finished box size. The insert cavity, protective clearance, box inside dimensions and box outside dimensions must then be engineered and confirmed with a representative physical sample.
Core Rule
Measure the real packed system, not an ideal product. Convert measurements into a structural hypothesis, then let a sample prove the fit before bulk production.
1. Freeze the pack-out before measuring
The same product can require different boxes depending on how it is presented. A bottle standing upright, lying flat or paired with an applicator has a different footprint and load path. Decide the intended orientation, opening experience and contents before the tape measure appears.
| Freeze this | Record this before measurement | | :--- | :--- | | Product state | As sold and shipped: closed, capped, folded, assembled, deflated or locked. | | Orientation | Which face is front, which direction is up, and how the customer removes it. | | Contents | Primary item, refill, cable, charger, cap, scoop, pump, applicator, and manual. | | Secondary wrap | Polybag, tissue, sleeve, protective film, or moisture barrier inside the box. | | Retail/ecommerce | Shelf presentation, hang tab, window, or ship-alone requirement. |
Do not average different pack-outs. A gift set with three components is not the same SKU geometry as a single-product carton. Record each configuration separately.
2. Use a consistent L × W × H orientation
Define three perpendicular axes that match the intended pack-out. Label them clearly on a photo or sketch. Values are only useful when the orientation is visible to the factory team.
- Place the product in the final packed state on a stable, level surface.
- Choose and mark the three orthogonal axes (Top, Front, Side).
- Measure between the furthest physical points on each axis without compressing the product.
- Record the range across multiple units rather than selecting one perfect sample.
3. Measure a production range, not one perfect sample
Products vary. Molded parts, filled pouches, and wrapped cables may not finish at one exact size. A single prototype can produce a cavity that pinches later units.
| Record | Why the box team needs it | | :--- | :--- | | Nominal value | The design target on the drawing—useful for reference. | | Observed minimum | Reveals looseness or presentation changes in a fixed cavity. | | Observed maximum | Drives interference risk; must be checked against product tolerance. | | Weight range | Influences board/insert choice and movement protection. |
4. Measure irregular, soft or moving products as controlled envelopes
Imagine the smallest rectangular envelope that contains the product in its approved packed state. Measure its extreme points.
| Product | Measurement control | Hidden risk | | :--- | :--- | :--- | | Bottle with pump | Lock the nozzle; measure the furthest rotation point. | Accidental rotation can strike the box wall. | | Device with cable | Define the cable fold and tie; measure the bundle. | A loose cable can raise the lid or scratch the finish. | | Soft pouch | Define fill level and compression; photograph the state. | Uncontrolled compression creates inconsistent fit. | | Glass jar | Measure lid and widest body; identify impact zones. | Largest diameter alone doesn't specify bottom support. |
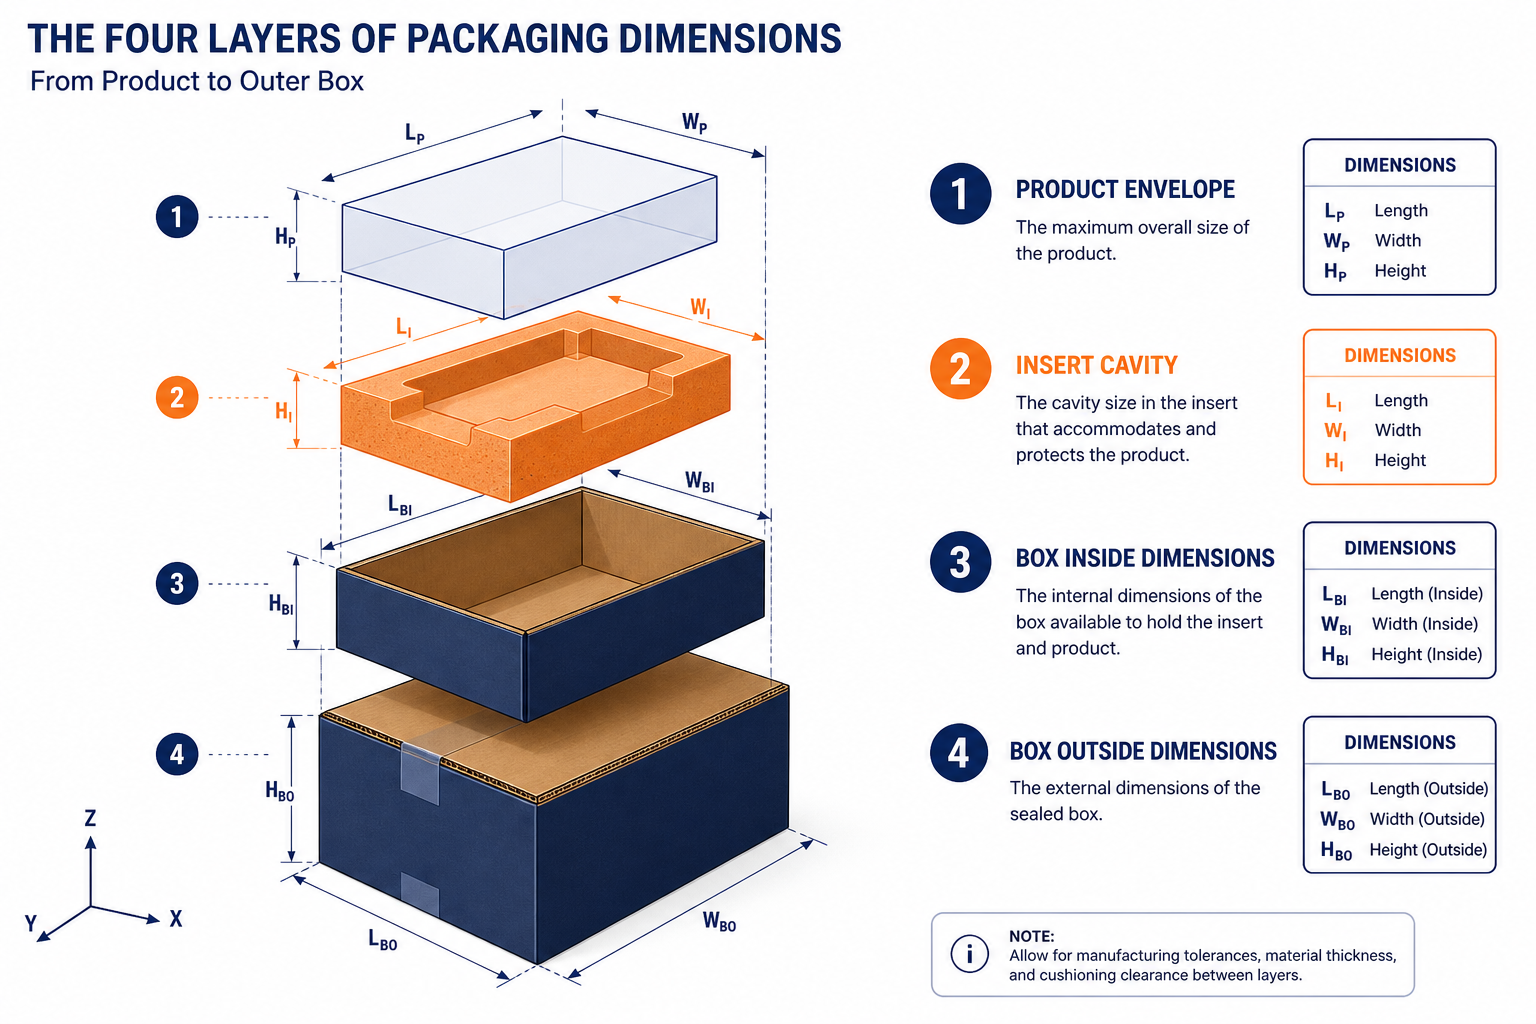
5. Separate four dimensions in your custom box guide
The phrase ‘box size’ can refer to different physical objects. Always specify the layer to avoid procurement errors.
| Layer | Definition | Decision use | | :--- | :--- | :--- | | Product envelope | The smallest 3D space containing the complete pack-out. | Starting input—not the final box size. | | Insert cavity | The geometry that locates and retains the product. | Depends on custom packaging inserts material. | | Box inside size | Usable internal space after board and liners are considered. | See our custom boxes for board thickness impacts. | | Box outside size | The finished external size of the box. | Affects shipping weight and master-carton plans. |
6. Do not add a universal clearance
A rule such as ‘add 2 mm on every side’ can be wrong for both directions. A flexible paperboard tab and a rigid foam pocket do not behave the same way. Material response, insertion force, and removal access all affect the engineering decision.
Buyer instruction: Ask for the proposed cavity and box inside dimensions, the design assumptions behind them, and a physical sample using representative product units.
7. Validate the complete assembly before bulk production
A structural sample path ensures the fit is reliable before you commit to printed artwork.
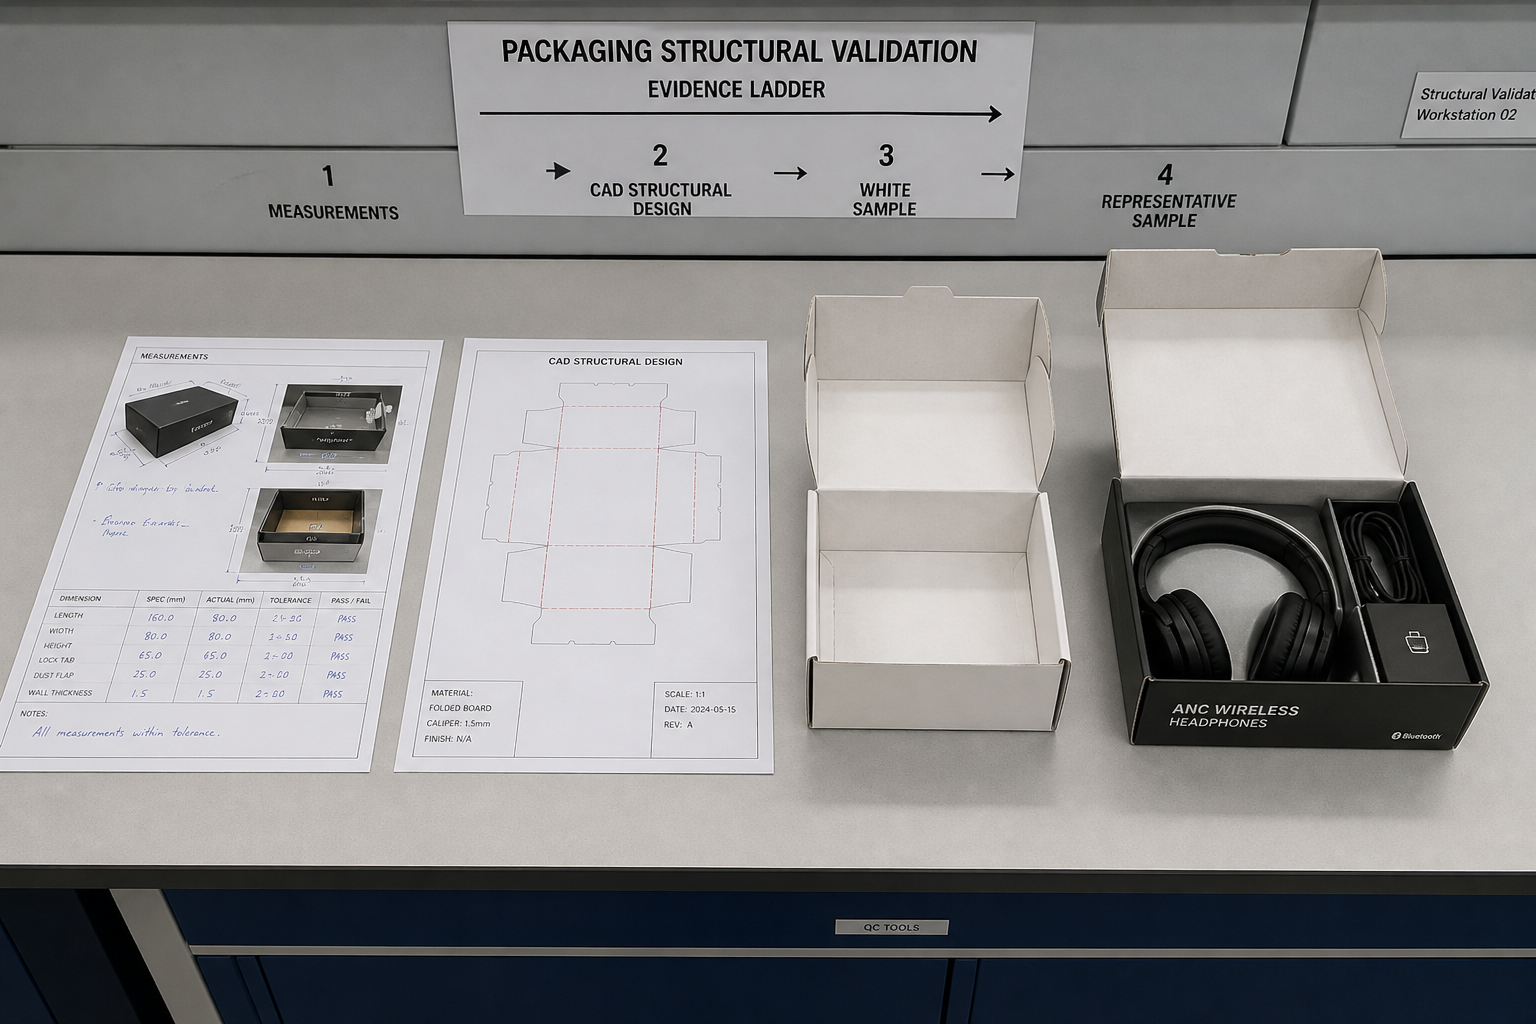
| Gate | Physical approval question | | :--- | :--- | | Structure | Does the box close, lock, and stack as intended? | | Fit | Do large units load without damage? Do small units remain stable? | | User experience | Can the customer grip and remove each item easily? | | Logistics | Are the outside dimensions and mass confirmed for the carrier? |
Structural fit is one gate. If the package must survive a specific hazard, choose a relevant test plan based on ISTA or ASTM D4169 frameworks. Review our structural design capabilities to see how we coordinate these tests.
Frequently Asked Questions
Should I send product dimensions or the desired box size? Send product measurements, orientation, and complete contents first. If you have a target outside size for shelf reasons, label it as a constraint—not as the cavity size.
How much extra space should I add around a product? There is no safe universal addition. Clearance depends on the measured product range, insert material, and sample results.
How do I measure an irregularly shaped product? Freeze the packed state, measure the extreme points of its rectangular envelope, and identify the surfaces that need support. Send CAD or a physical sample when geometry is complex.
Can a 3D file replace sending a physical product? It accelerates geometry work but may not represent weight, friction, or compression. High-risk fits still need representative physical validation.
Ready to Finalize Your Box Structure?
To get an accurate structural review, send product measurements for review including:
- Product name, revision, and intended orientation.
- Measured min/max L × W × H and weight.
- All accessories, bags, and manuals included.
- Photos of the front, top, and side views.
Authoritative Sources
- ISTA: Getting Started with Design & Testing
- ASTM D4169-22: Standard Practice for Performance Testing of Shipping Units
- UPS: Package Dimensions and Weight Guide